Magic Wand...The Making.
When we visited the Universal Studios in Florida, in May, the toughest time I had, was to get my daughter away from Ollivander's shop. The magic wands, were literally flying off the shelves....I admit, the interactive wands were tempting for anyone.
Any wand, magic or otherwise, would not last long in her hands, so I decided to make her one the easy way....with a bead , and a skewer as the base, and Cold Porcelain Clay, crystals and stones to make it special.

Any wand, magic or otherwise, would not last long in her hands, so I decided to make her one the easy way....with a bead , and a skewer as the base, and Cold Porcelain Clay, crystals and stones to make it special.
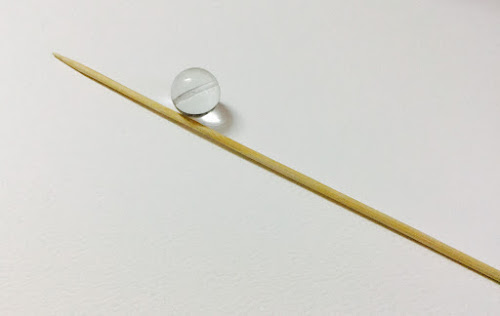
It is a regular wooden skewer we use in the kitchen. The bead I chose is a transparent sphere..but you can choose any beads, crystal or semi precious stones, in various shapes. Choosing a bead makes it easier to anchor the bead to the tip,of the skewer

You may have to lightly file the skewer tip a bit..but take care that it does not thin down to become fragile. Another option would be a piece of metal wire..which should be about 14 gauge or thicker. I used just the White Fevicol glue ..it works well on wooden surfaces..but if you are planning to use any other material, maybe a glue gun would be handy.
M
The next step, is to take a nice round ball of clay about the size of a gooseberry. Push the broad end of the skewer through the centre of the clay ball. Now lay it on a table and apply even pressure with fingers till the ball of clay covers about half of the wand. I did not intend to cover more than half the wand with clay. If you prefer to have the entire wand covered just go ahead and get a bigger ball of clay. If there is excess, just trim it off as it clay reaches near the bead.
Now it is time to decorate the wand. Roll out very thin snakes of clay and stick them on to the bead . It is better to have a design in mind before you start using glue to stick the tendrils on. I also used clay to fix the area joining the skewer and the bead. To hide the other end of the bead hole, roll a tiny ball of clay , and fix a tiny white crystal on it.
At the handle, decorate with hand made leaves, or any other shapes that you would wish to. I took three tiny balls, rolled them into a point at one side. Then pressed the tear drops thus formed, to make them flat. Added the mid vein and the notches on the side with a thin knife, to give the details on the leaves. I also rolled a few more than snake shapes and added matching tendrils just above the leaves, to match those on the bead. Also wound the longest tendril around the skewer.
Once the clay details have been added, keep it for curing. I kept it to dry for about 5 hours. Once dry, it is safe to start colouring.
Now to paint, I chose Fevicryl Metallic colours in Dull Gold, Pink, green and dark pink. For the tendrils covering the bead, I used a base coat of gold then added accents of green. I also used a few stones to decorate the bead.
I started with the gold shade here too, the undersides of the leaves, then about a third of the handle. To give it am ombré effect, I mixed gold and dark ,pink and moving farther to the end, I used just the dark pink to the end of the handle
The sides of the leaves and the tops were painted green. I added a stone each on each leaf. Again, I gave a base coat of gold above the leaves , on the tendrils, highlighted with green. From above the wound vine or tendril, I gave a coat of pink. While between the tendrils is a mix of gold and pink.
Finally, once the paint is dried, you can add varnish, or Ren wax. I used the latter.


You did a beautiful job! I bet she loves it. I've made wands but I use chopsticks, then I use hot glue and wind it around and around the thick end of the chopstick, letting it drip and swirl for texture. I also will stick beads or crystals into it or at the top. After the glue dries, I paint it brown. They come out pretty good!
ReplyDeleteSounds very nice, Jo...have you any pics? I would love to get a look at them..
Deletelooks very interesting Swapna
ReplyDeleteThank you, Divya.....
Delete